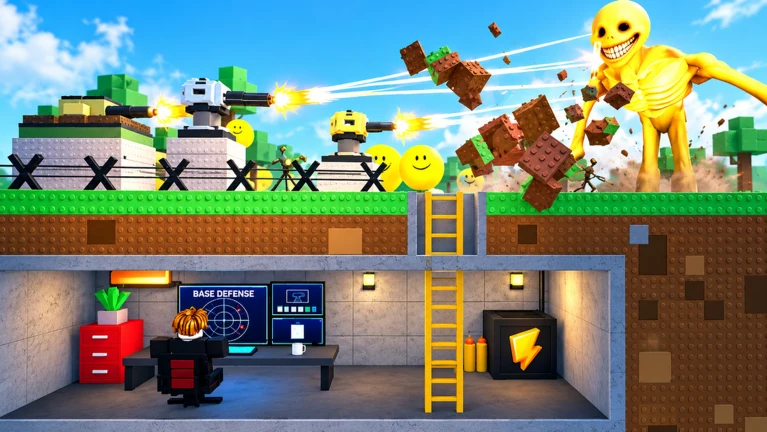
- Bunker vs Verity best strategy: build compact, defend the entrance, and hold a coin reserve for repairs.
- Core loop: construct by day, reinforce weak lanes, and survive increasingly dangerous Verity waves at night.
- Turret rule: prioritize overlapping coverage over quantity, and place defenses covering the main approach.
- Economy tip: never spend your full balance before nightfall, repairs win late waves.
- Co-op edge: assign builder, gunner, and scout roles to eliminate duplicate spending and uncovered breaches.
Core Strategy Overview
The best strategy in Bunker vs Verity follows one principle: convert every coin into reliable survival power before pressure peaks. Matches are won by players who finish their essential structure before nightfall, maintain clear firing lanes, and repair faster than the Verities can break through. Chasing enemies away from your defensive zone, overbuilding decorative rooms, or emptying your wallet on early upgrades are the three most common ways runs collapse.
Your opening decisions matter more than your late-game upgrades. A compact bunker with a controlled entrance outperforms a sprawling base with unfinished walls, because every exposed section is a potential breach point the Verities will exploit.
| Strategic Pillar | What It Means | Common Mistake |
|---|---|---|
| Location | Pick a spot with clear sightlines and expansion room | Building so tight that walls block firing paths |
| Structure | Walls and entrance first, compact interior | Decorative construction during the opening phase |
| Defense | Overlapping coverage on the main approach | All defenses stacked in one isolated spot |
| Economy | Keep a repair reserve at all times | Spending the entire balance before nightfall |
| Reaction | Repair and hold the weakest side | Abandoning the defense to chase enemies |
Survival depends on maintaining the bunker while dealing with threats. If you leave the defensive zone to chase a Verity, you create the opening that ends your run.
Best Bunker Builds by Situation
The strongest layout depends on your team size, resources, and how long you expect the waves to last. Compare the four proven approaches below and pick the one that matches your match conditions.
Compact Solo Bunker
- Best for: solo players and early survival
- Small central room with a controlled entrance
- Short wall lines, defenses on the primary approach
- Weakness: blocked firing angles are very costly
Cooperative Crossfire Bunker
- Best for: two or more players
- Central area with two overlapping firing directions
- Teammates cover separate approach lanes
- Weakness: crowding reduces visibility if expanded without a plan
Long-Wave Reinforced Bunker
- Best for: extended survival and late waves
- Primary line, protected interior route, fallback position
- Reserve resources for repeated repairs
- Weakness: expensive footprint, unfinished sections are vulnerable
Hidden-Defense Layout
- Best for: protecting valuable turrets
- Defenses placed behind strong structural sections
- Clear openings preserved toward the approach
- Weakness: overusing cover creates blind spots
Every build must protect the entrance, preserve firing lanes, provide a safe movement route, and include a fallback position. A layout missing any of these four elements will fail under sustained wave pressure.
Turret Placement Priorities
Turret value changes with the threat pattern and stage of a run. Instead of chasing a single "best" turret, build a defense network where each role covers a weakness. Use this priority framework when deciding where your next coin goes.
| Priority | Defense Role | Best Use | Key Strength |
|---|---|---|---|
| 1st | Balanced core defense | Primary position before specializing | Reliable damage, useful range, strong general value |
| 2nd | Crowd-control defense | Waves where multiple threats arrive together | Buys time for repairs near chokepoints |
| 3rd | Single-target damage | Late waves with one dangerous Verity | High damage on clear approach lanes |
| 4th | Fast-attack early defense | Opening phase with limited resources | Quick response to nearby threats |
| 5th | Narrow-specialty defense | Situational builds and secondary lanes | Effective only when placement matches the lane |
Follow this placement sequence for the best results:
Cover the main approach
Place your first turret where it covers the entrance and the largest shared firing lane. One dependable position beats three scattered ones.
Create overlap
Add a second defense so its firing arc crosses the first. Overlapping coverage means no Verity walks through unharmed.
Fill the proven gap
Only add more turrets when a lane is consistently slipping through. If existing turrets are blocked or mispositioned, fix placement before buying more.
Specialize for late waves
Once the core network holds, invest in single-target damage for durable threats and crowd control for grouped pushes.
Before every wave, verify three things: firing angles are unblocked, coverage has no gaps, and each turret is actually contributing damage. Repositioning a blocked turret is often worth more than buying a new one.
Coin Management and Upgrade Order
Coins win matches only when they are converted into survival power at the right moment. The biggest economy mistakes are spending everything before the first defense is functional and adding turrets when existing ones are poorly placed.
| Stage | Upgrade Priority | Resource Rule | Common Waste |
|---|---|---|---|
| Opening | Essential construction, then the key defensive position | Never spend the full starting budget on optional structures | Building multiple low-impact positions early |
| Development | Improve the wall or turret limiting survival, then expand | Keep a repair reserve at all times | Adding turrets when existing ones are blocked |
| Late | Sustained damage, structural durability, dangerous-lane coverage | Enter hard waves with a reserve, not mid-wave income | Cosmetic upgrades while the core is vulnerable |
| Team play | Coordinate purchases under a shared spending plan | Assign players to track structural and offensive needs | Duplicate construction from poor communication |
Treat late-wave rewards as reinforcement funds, not guaranteed spending money. A coin reserve for one emergency repair is usually worth more than a small early upgrade.
Wave-by-Wave Defense Strategy
Enemy waves grow stronger as the match progresses, so successful defense means spending resources before a crisis begins, not during it. This table breaks down the correct focus for each phase.
| Phase | Wall Priority | Turret Priority | High-Pressure Action |
|---|---|---|---|
| Early waves | Close exposed entrances before expensive upgrades | One turret covering the main approach | Eliminate enemies reaching the bunker, skip expansion |
| Middle waves | Upgrade sections under concentrated attack | Add coverage only when a lane slips through | One player maintains defense, another builds or upgrades |
| Late waves | Reinforce the weakest sections first | Upgrade effective positions, maintain overlap | Repair immediately after damage spikes, focus the deadliest target |
| Between waves | Inspect damage, find the next breach point | Check angles and coverage gaps | Assign responsibilities before the wave starts |
Protect the bunker core above everything else. Concentrate fire on the most dangerous targets first, and never commit your full repair reserve before a difficult wave begins.
Co-op Roles and Pre-Wave Checklist
Coordinated teams outperform groups of players building the same defenses independently. Divide responsibilities by team size:
| Team Size | Recommended Roles | Key Coordination |
|---|---|---|
| Two players | Builder and Defender | Communicate before any coin is spent |
| Three players | Builder, Gunner, Scout | Scout calls threats early so the builder reinforces in time |
| Four or more | Dedicated defense team with a resource coordinator | Short callouts: lane, repair needed, urgency level |
| Any size | Wave Coordinator | Confirms repairs, staffing, and coin reserve before each wave |
Run through this checklist during every preparation window:
Before Every Wave:
- Bunker is fully repaired with no exposed sections
- All firing angles are unblocked and coverage overlaps
- Movement paths inside the base are clear
- Coin reserve covers one emergency repair
- Team roles and lane assignments are confirmed
Make the plan during the preparation window, not when enemies are already attacking. Teams that assign responsibilities between waves react faster and waste fewer coins.
FAQ
Q: What is the best strategy for Bunker vs Verity beginners?
Build a compact bunker with a controlled entrance, place defenses covering the main approach, and keep a coin reserve for repairs. Avoid decorative construction early and finish all essential walls before nightfall.
Q: Should I buy more turrets or upgrade walls first?
Upgrade whichever is directly limiting your survival. If existing turrets are blocked or mispositioned, fix placement before buying new ones. If walls are breaking under concentrated attack, reinforce those sections before expanding coverage.
Q: Why do I keep losing on late waves?
Most late-wave losses come from entering the wave without a coin reserve, having gaps in turret coverage, or abandoning the defense to chase enemies. Focus the deadliest targets, repair immediately after damage spikes, and keep a fallback position.
Q: How should a co-op team split responsibilities?
Assign a builder for construction and repairs, a gunner for turret operation and sustained damage, and a scout to monitor exposed approaches. Designate one player as resource coordinator to prevent duplicate purchases.