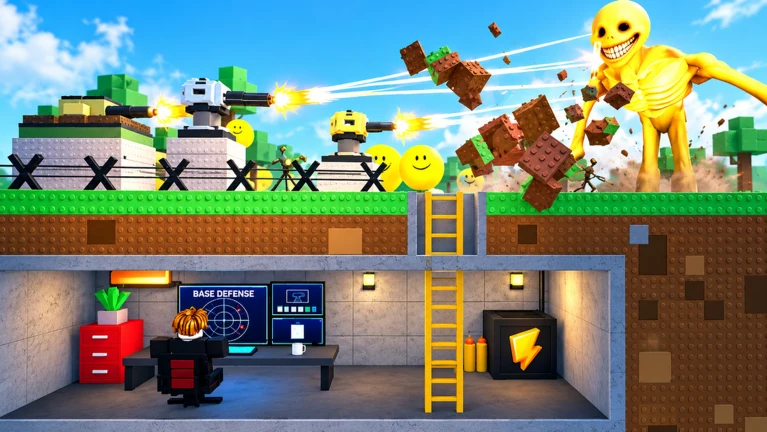
- How to beat Verity: Survive by building a compact bunker, layering turret coverage, and holding a coin reserve for repairs.
- Core rule: Verities grow stronger each wave, so reinforce weak lanes between attacks instead of expanding blindly.
- Turret priority: Overlapping fields of fire on the main entrance beat scattered single placements.
- Co-op edge: Assign a builder, gunner, and scout so no lane goes unwatched.
- Biggest mistake: Spending your entire coin balance before nightfall with nothing left for emergency repairs.
Understanding Verity and the Threat Pattern
In Bunker vs Verity, the Verities are the enemy force that attacks your bunker in increasingly demanding waves. You do not beat Verity by chasing enemies around the map — you beat Verity by making your bunker the strongest position on the field and letting concentrated firepower do the work. The core loop is simple: build during the day, defend at night, repair between waves, and scale your defenses before the pressure peaks.
Chasing Verities away from your defensive zone creates openings. Leaving your bunker to fight in the open removes your turret support, exposes your walls, and lets enemies reach your core unopposed. Stay near your firing positions and fight from cover.
The table below breaks down how the threat escalates and what each phase demands from you:
| Phase | Threat Level | Enemy Behavior | Your Priority |
|---|---|---|---|
| Early waves | Low | Small groups, weak attacks | Close exposed entrances, place first turret on main approach |
| Middle waves | Medium | Groups concentrate on one lane | Upgrade attacked wall sections, add lane coverage |
| Late waves | High | Durable Verities, sustained pressure | Repair fast, focus fire on the most dangerous targets |
| Between waves | Recovery | Short preparation window | Inspect damage, assign roles, split coins for repair + upgrade |
Build the Right Bunker Before the First Attack
Your bunker layout determines whether you survive the first night. A defensible position needs clear sightlines, a controlled entrance, a safe interior movement route, and a fallback position for repairs. Space is a resource — building too tightly blocks your own firing arcs, while spreading too wide leaves unfinished sections vulnerable.
Compact Solo Bunker
- Small central room with one controlled entrance
- Short wall lines reduce repair cost
- Best for solo players and early survival
- Weakness: blocked firing angles are very costly
Crossfire Bunker
- Two overlapping firing directions on shared lanes
- Teammates cover separate approaches
- Best for two or more players
- Weakness: crowded interiors hurt visibility
Reinforced Long-Wave Bunker
- Primary line plus fallback position behind it
- Protected interior route for repairs
- Best for extended waves and late-game runs
- Weakness: expensive to build, vulnerable mid-construction
Prioritize overlapping turret coverage over isolated placements. One dependable turret covering the main approach is worth more than three scattered turrets that each cover a lane no enemy uses.
Step-by-Step: Surviving a Verity Assault
Follow this sequence every match to consistently beat Verity waves:
Choose a defensible location
Pick a spot with clear sightlines toward the likely approach, room for repairs, and space to expand later. Never build where walls or teammates block your firing path.
Build the core structure
Place main walls and the entrance first. Keep the interior compact and monitorable. Skip decorative construction during the opening phase.
Place first defenses
Position your initial turret where it covers the main approach or the largest shared firing lane. Overlap coverage rather than stacking defenses in one spot.
Bank a coin reserve
Earn coins from early waves but keep a reserve for repairs, extra walls, and emergency defenses. A reserve is often more valuable than a small early upgrade.
Run a final night check
Before the attack begins, verify firing angles, clear movement paths, confirm the team is inside the defensive zone, and look for missing wall sections or blocked turrets.
Respond and repair
During the assault, watch the approach, repair damaged sections immediately, and shift attention to the weakest side of the bunker instead of abandoning the defense.
Coins, Turrets, and Upgrade Priorities
Resource discipline is what separates teams that clear late waves from teams that collapse on wave three. Convert coins into reliable survival power, improve defenses that are already proving useful, and never commit your full reserve before a difficult wave.
| Stage | Upgrade Priority | Common Waste to Avoid |
|---|---|---|
| Opening | Essential construction, then best defensive position | Building multiple low-impact positions before the first defense works |
| Development | The wall or turret directly limiting survival | Adding turrets when existing ones are blocked or misplaced |
| Late phase | Sustained damage, structural durability, danger-lane coverage | Cosmetic or low-impact purchases while the core is exposed |
| Team play | Shared spending plan: stabilize, then expand | Duplicate construction from poor communication |
When choosing turret roles, match the defense to the threat:
| Turret Role | Best Use | Rating |
|---|---|---|
| Balanced core defense | Primary entrance coverage, general value | ★★★★★ |
| Single-target damage | Eliminating one durable Verity quickly | ★★★★☆ |
| Crowd-control defense | Groups hitting the bunker simultaneously | ★★★★☆ |
| Fast-attack early defense | Establishing initial coverage cheaply | ★★★☆☆ |
| Narrow-specialty defense | Situational lanes only | ★★☆☆☆ |
Enter difficult waves with a coin reserve rather than relying on income earned during the attack. Concentrate fire on the most dangerous Verity first and repair immediately after damage spikes.
Co-op Roles That Beat Verity Faster
Coordinated teams dramatically outperform groups of players building independently. Divide construction, turret operation, resource planning, and frontline response so no lane goes unwatched and no coins get duplicated.
| Team Size | Recommended Roles | Key Coordination Tip |
|---|---|---|
| Two players | Builder + Defender | Communicate before any coin purchase |
| Three players | Builder, Gunner, Scout | Scout calls threats early so the builder reinforces in time |
| Four or more | Dedicated defense team + resource coordinator | Use short callouts: lane, repair needed, urgency |
| Any size | Wave coordinator | Plan during the prep window, not mid-attack |
Pre-Night Checklist:
- All entrances closed with no wall gaps
- Turrets cover the main approach with overlapping arcs
- Coin reserve saved for emergency repairs
- Team roles assigned and positions confirmed
- Interior movement path clear for repairs
FAQ
Q: How do I beat Verity consistently in Bunker vs Verity?
Build a compact bunker with a controlled entrance, place turrets with overlapping coverage on the main approach, keep a coin reserve for repairs, and fight from your defensive positions instead of chasing enemies into the open. Reinforce your weakest lane between waves.
Q: Should I upgrade walls or add more turrets first?
Upgrade whichever is directly limiting your survival. If enemies break through one lane repeatedly, upgrade those wall sections first. If walls hold but enemies pile up, add turret coverage — but only after confirming existing turrets are not blocked or misplaced.
Q: What is the biggest mistake when fighting Verities?
Spending your entire coin balance before nightfall. Without a repair reserve, one damaged wall section can collapse your entire defense during a high-pressure wave. Keep funds available for emergency repairs and one defensive upgrade.
Q: Is a bigger bunker always better?
No. Larger footprints cost more to build and leave unfinished sections vulnerable during early attacks. A compact layout with dependable entrance coverage survives longer per coin spent than an ambitious structure you cannot finish or repair.