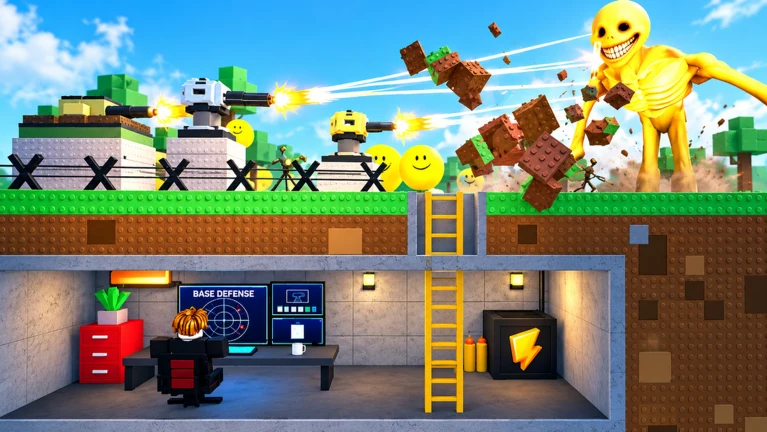
- Bunker vs Verity survival revolves around defending your bunker through escalating Verity waves.
- Early priorities: secure a compact defensible layout, cover the entrance, and hold a coin reserve.
- Mid-game rule: reinforce repeatedly attacked wall sections before adding secondary defenses.
- Late-game rule: prioritize sustained damage, structural durability, and emergency repair funds.
- Co-op edge: assign clear roles for building, turret operation, repairs, and threat spotting.
Survival Fundamentals: How Bunker vs Verity Works
Bunker vs Verity, developed by Beyondd Games, is a Roblox defensive survival experience where players build and protect a bunker against increasingly demanding enemy waves of Verities. Matches run on servers of up to six players, and success depends on managing construction, turret placement, and coins under rising pressure.
A strong run follows one core principle: convert resources into reliable survival power before a crisis begins. That means building the minimum structure needed to control the battlefield, improving defenses that are already proving useful, and keeping a reserve for repairs rather than spending on every available option.
| Game Element | What It Does | Survival Impact |
|---|---|---|
| Bunker walls | Block Verity approach and absorb damage | Structural backbone; upgrade attacked sections first |
| Turrets | Provide automated damage on approach lanes | Primary firepower; placement matters more than quantity |
| Coins | Fund construction, repairs, and upgrades | Reserve fuel; spending it all early is a common loss cause |
| Verity waves | Escalating enemy pressure over time | Dictates when to upgrade, repair, or expand |
| Teammates (6-player servers) | Divide roles and cover multiple lanes | Coordination prevents duplicate spending and breaches |
Do not spend your entire coin balance before the first night. A reserve for emergency repairs is often more valuable than a small early upgrade, because a single breached wall can end a run.
Step-by-Step Survival Flow
Every successful match follows the same opening rhythm: establish, defend, earn, prepare, respond. Follow this sequence to avoid the resource traps that eliminate most new players.
Choose a Defensible Location
Pick a position with clear sightlines for your defenses and enough room for movement, repairs, and later expansion. Avoid building so tightly that walls or teammates block firing paths.
Build the Bunker Structure
Place main walls and the entrance first, then create a compact interior that can be reinforced without wasting early resources. Skip decorative construction during the opening phase.
Place First Defenses
Position defensive equipment where it covers the approach to the entrance and the most likely attack lane. Prioritize overlapping coverage over isolated placements.
Earn and Preserve Coins
Use safe windows to earn coins while maintaining funds for repairs, additional walls, and emergency defenses. Never enter nightfall with an empty wallet.
Prepare for the Night
Finish essential structure, check firing angles, clear movement paths, and get the team near the defensive area before the attack begins. A final inspection often reveals blocked turrets or missing wall sections.
Respond to Verities
Watch the approach, repair damaged sections, and focus attention on the weakest side of the bunker. Chasing enemies away from the defensive zone creates openings.
Between waves, walk your perimeter: check damaged sections, turret firing angles, and coverage gaps. Most late-run failures trace back to a weakness spotted too late.
Wave-by-Wave Strategy Table
Enemy waves grow stronger as the match progresses, so spending decisions must shift with each phase. Use this table to plan resources before pressure peaks.
| Phase | Wall Priority | Turret Priority | Coin Preparation |
|---|---|---|---|
| Early waves | Close exposed entrances; basic structure before upgrades | One turret covering the main approach | Keep a reserve after first construction |
| Middle waves | Upgrade frequently attacked sections first | Add coverage only when a lane slips through | Save for emergency repair plus one upgrade |
| Late waves | Reinforce weakest sections; structural survival first | Upgrade effective positions; maintain overlap | Enter hard waves with a reserve, not mid-wave income |
| Between waves | Inspect damage; predict next breach point | Verify firing angles and damage contribution | Split coins between repairs and next upgrade |
Treat late-wave rewards as reinforcement funds rather than spending money. Concentrate fire on the most dangerous targets first and repair immediately after damage spikes.
Best Bunker Builds Compared
The strongest layout depends on team size, resources, and expected wave length. These four proven designs each trade flexibility for a specific strength.
Compact Solo Bunker
- Best for: solo players and early survival
- Small central room, controlled entrance, short wall lines
- Invest in entrance coverage and durability first
- Weakness: blocked firing angles are very costly
Cooperative Crossfire Bunker
- Best for: two or more players
- Central area with two overlapping firing directions
- Split repair, building, and monitoring duties
- Weakness: crowding reduces visibility if expanded without a plan
Long-Wave Reinforced Bunker
- Best for: extended survival and later waves
- Primary defense line plus interior route and fallback position
- Reserve resources for repairs on exposed sections
- Weakness: large footprint costs more and is vulnerable mid-build
Hidden-Defense Layout
- Best for: protecting valuable defenses
- Defenses placed behind strong structural sections
- Preserve clear openings toward the approach
- Weakness: overusing cover creates blind spots and shortens range
Turret Roles and Coin Management
Turret value changes with the threat pattern and stage of a run. Rather than a fixed ranking, match each defensive role to the wave where it matters most.
| Role | Tier | Strengths | Best Use |
|---|---|---|---|
| Balanced Core Defense | S | Reliable repeated-wave damage, useful entrance range | Primary position before specializing |
| Single-Target Damage | A | Eliminates durable threats quickly | Later waves with one dangerous Verity |
| Crowd-Control Defense | A | Manages groups, buys repair time | Multiple simultaneous threats near chokepoints |
| Fast-Attack Early Defense | B | Quick response, low initial cost | Opening phase coverage with limited resources |
| Narrow-Specialty Defense | C | Effective only in exact placements | Situational lanes and specific layouts |
Upgrade priorities follow the same staged logic:
| Stage | Upgrade Priority | Common Waste to Avoid |
|---|---|---|
| Opening | Essential construction, then key defensive position | Building multiple low-impact spots before confirming the threat lane |
| Development | The wall or turret directly limiting survival | Adding turrets when existing ones are blocked or misplaced |
| Late | Sustained damage, durability, dangerous-lane coverage | Cosmetic upgrades while the core remains vulnerable |
| Team play | Shared plan: stabilize, maintain damage, then expand | Duplicate purchases from poor communication |
Assign one player to track structural needs and another to track offensive needs. Short, specific callouts — lane, repair needed, urgency — prevent both breaches and wasted coins.
Pre-Night Checklist:
- All entrances closed with no exposed wall gaps
- Turrets placed with overlapping, unblocked firing lanes
- Coin reserve available for at least one emergency repair
- Interior movement path clear for fast repairs
- Team roles assigned before the wave begins
Survival FAQ
Q: What is the best strategy for surviving Verity waves in Bunker vs Verity?
Build a compact, defensible bunker early, keep a coin reserve instead of spending everything, and upgrade the wall sections that take repeated damage. Between waves, inspect your perimeter and fix coverage gaps before pressure rises.
Q: How many players can play Bunker vs Verity together?
Servers hold up to six players. Co-op teams perform best when responsibilities are divided among building, turret operation, resource planning, and frontline response, rather than everyone building the same defenses independently.
Q: Should I spend all my coins on turrets early?
No. Early coins are better spent on essential structure and one dependable turret covering the main approach. Keep a reserve for emergency repairs, because a single breached wall can end a run regardless of how many turrets you own.
Q: Which bunker build is best for solo play?
The Compact Solo Bunker: a small central room with a controlled entrance and short wall lines. Invest in entrance coverage and structural durability before adding secondary rooms, since limited space makes misplaced walls very costly.
This is an independent fan-made guide website and is not affiliated with Beyondd Games or Roblox. For the latest game information, visit the official Bunker vs Verity Roblox listing.