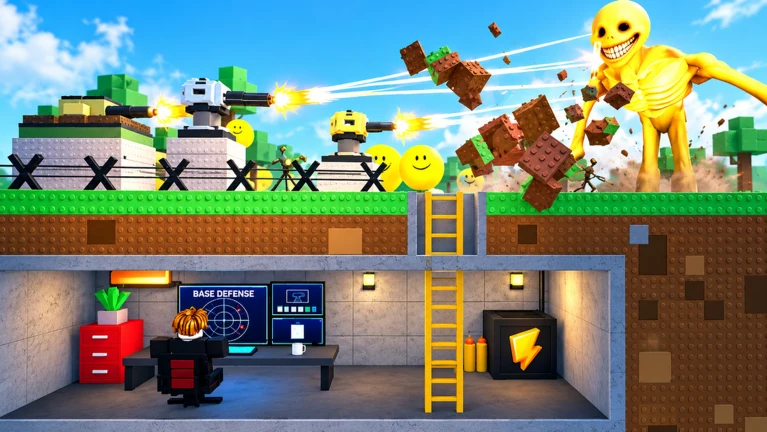
- Bunker vs Verity bunker battles reward preparation over aggression — build before nightfall, never during
- Entrance control decides most fights: one monitored chokepoint beats three exposed gaps
- Keep a coin reserve for emergency repairs instead of spending everything on early upgrades
- Overlapping turret coverage outperforms isolated placements during high-pressure waves
- Team roles (builder, gunner, scout) prevent duplicate purchases and unattended breaches
How Bunker Battles Work in Bunker vs Verity
In Bunker vs Verity, a bunker battle is the core loop of the game: you construct a bunker, place defenses, and then hold that structure against escalating waves of Verities. Developed by Beyondd Games as a Roblox survival and escape experience with servers of up to 6 players, the game pressures you to balance construction, turret placement, and coin economy — all while nightfall approaches and enemies grow stronger with each wave.
The defining tension of every bunker battle is time. The safe preparation window is finite, and every coin you spend on the wrong structure is a coin unavailable when a wall section starts failing under concentrated attacks. Players who treat the battle as a building puzzle tend to outlast players who treat it as a shooting gallery.
Survival in a bunker battle depends on maintaining the bunker, not chasing enemies. Leaving the defensive zone to pursue Verities creates openings that waves will exploit.
The three pillars of any successful bunker battle:
| Pillar | What It Covers | Common Failure |
|---|---|---|
| Structure | Walls, entrance, interior routes | Exposed entrances and unfinished sections |
| Defense | Turrets, firing lanes, coverage overlap | Blocked firing angles and blind spots |
| Economy | Coin income, reserves, upgrade timing | Emptying the wallet before nightfall |
Choosing and Building Your Bunker Position
Position selection is the first and most consequential decision in any Bunker vs Verity match. A defensible location gives your turrets clear sightlines and leaves room for repairs, movement, and later expansion.
Compact Solo Bunker
- Small central room, controlled entrance
- Short wall lines reduce cost
- Best for early survival runs
- Weakness: tight space makes blocked angles costly
Cooperative Crossfire Bunker
- Two overlapping firing directions
- Teammates cover separate lanes
- Best for two or more players
- Weakness: crowding reduces visibility if expanded without a plan
Long-Wave Reinforced Bunker
- Primary line plus fallback position
- Protected interior route for repairs
- Best for extended waves
- Weakness: larger footprint costs more and is vulnerable mid-build
Scout a defensible location
Pick ground with clear sightlines toward likely approach lanes and enough space for repairs and expansion. Avoid terrain that funnels enemies behind your firing arc.
Lay the core structure
Place main walls and the entrance first, keeping a compact interior that can be reinforced cheaply. Skip decorative construction during the opening.
Position first defenses
Cover the approach to the entrance and the most likely attack lane. Overlapping coverage matters more than placing every defense in one spot.
Bank a coin reserve
Earn coins during safe windows but do not spend the full balance before nightfall. A reserve is often more valuable than a small early upgrade.
Run a final pre-night inspection
Check firing angles, clear movement paths, confirm the team is positioned, and repair any wall gap before the first Verities arrive.
Never build so tightly that walls, props, or teammates block your own turret firing paths. A blocked turret contributes zero damage regardless of its tier.
Turret Roles and Defense Matchups
Turret value in Bunker vs Verity shifts with the wave pattern and stage of the run. Rather than chasing a single "best" turret, build a defensive network where each role covers a gap the others leave open.
| Tier | Role | Strengths | Best Use |
|---|---|---|---|
| S | Balanced Core Defense | Reliable damage, good range, strong general value | Primary position before specializing |
| A | Single-Target Damage | Melts durable threats, scales with support | Later waves with dangerous individual Verities |
| A | Crowd-Control Defense | Manages groups, buys repair time | Waves reaching the bunker simultaneously |
| B | Fast-Attack Early Defense | Quick response, cheap initial coverage | Opening phase before income stabilizes |
| C | Narrow-Specialty Defense | Effective only in the right lane | Situational builds and secondary lanes |
Use the wave phase to guide your defensive spending:
| Phase | Turret Priority | Key Action |
|---|---|---|
| Early waves | One dependable coverage piece on the main lane | Close exposed entrances before upgrading |
| Middle waves | Add coverage only when a lane slips | Upgrade frequently attacked wall sections |
| Late waves | Upgrade effective positions, keep overlap | Protect the core, repair after damage spikes |
| Between waves | Audit angles and coverage gaps | Assign responsibilities before the next wave |
If two turrets watch the same lane while another approach is untouched, your network has a gap — redistribute rather than stack.
Wave Survival and Coin Management
Enemy waves grow stronger as the match progresses, so defense depends on spending resources before a crisis begins rather than reacting during one. Coins convert into survival power only when they solve the current threat.
| Stage | Upgrade Priority | Resource Rule | Common Waste |
|---|---|---|---|
| Opening | Essential structure, then key defense | Never spend the full starting budget | Building low-impact positions everywhere |
| Development | The wall or turret limiting survival | Maintain a repair reserve | Adding turrets when existing ones are blocked |
| Late phase | Sustained damage and durability | Save for emergency repairs | Cosmetic upgrades on a vulnerable core |
| Team play | Shared spending plan, no duplicates | Assign purchase tracking | Two players buying the same defense |
Enter difficult waves with coins in hand. Relying on income earned mid-attack is one of the most common causes of late-run collapses in Bunker vs Verity.
Pre-Battle Checklist:
- Entrance is monitored and covered by at least one defense
- Firing lanes are clear of walls and teammates
- Coin reserve is held back for emergency repairs
- Weakest wall sections are reinforced
- Team roles and lanes are assigned before nightfall
Co-op Roles for Team Bunker Battles
With up to six players per server, coordination multiplies your effective power. Teams that divide responsibilities consistently outperform groups where everyone builds independently.
| Team Size | Suggested Roles | Coordination Tip |
|---|---|---|
| 2 players | Builder + Defender | Agree on purchases before spending |
| 3 players | Builder, Gunner, Scout | Scout calls threats early for reinforcement |
| 4+ players | Dedicated builder, turret operators, flex player | Designate one resource coordinator |
| Any size | Wave Coordinator | Confirms repairs and staffing between waves |
Use short, specific callouts — affected lane, required repair, urgency level — instead of vague warnings during active waves.
FAQ
Q: What is a bunker battle in Bunker vs Verity?
A bunker battle is the core defense loop: you build a bunker, place turrets and walls, then hold the structure against increasingly strong waves of Verities while managing coins and repairs.
Q: Should I spend all my coins before the first wave?
No. Keep a reserve for emergency repairs and one defensive upgrade. Spending the entire balance before nightfall is one of the most common causes of early failures.
Q: What matters more, turrets or walls?
Both, in sequence. Close exposed entrances with walls first, then invest in turret coverage. Upgrading walls that absorb repeated attacks is usually more efficient than adding redundant firepower.
Q: How do co-op teams avoid wasting coins?
Assign roles — builder, gunner, scout, and a resource coordinator — and announce major purchases before making them. This prevents duplicate construction and unattended breach points.