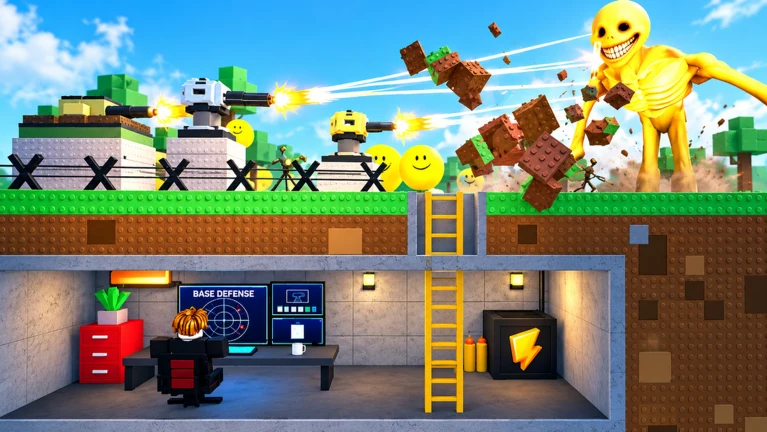
- Bunker vs Verity is a Roblox survival defense game by Beyondd Games with 6-player servers.
- Security house layouts should prioritize entrance coverage, overlapping turret arcs, and repair access.
- Wave scaling means your defense must be reinforced before pressure peaks, not after.
- Coin reserves are often more valuable than early optional upgrades.
- Team roles prevent duplicate purchases and unattended breach points.
Bunker vs Verity Security House Overview
In Bunker vs Verity, your security house is the difference between surviving the night and losing your run. The game is a defensive survival experience built around protecting a bunker, managing resources, and holding off increasingly demanding waves of Verities. A security house is not just walls — it is the combination of structure, turret placement, firing lanes, and repair access that keeps your team alive.
The core trade-off in any security house design is footprint versus coverage. Larger structures offer fallback positions but cost more and take longer to complete, leaving you exposed during early waves. Compact designs are cheap and quick, but a single blocked firing angle can undo the entire layout.
| Element | Purpose | Failure Mode |
|---|---|---|
| Walls and entrance | Control enemy approach | Unmonitored or open entrances |
| Turrets | Sustained damage on lanes | Blocked arcs, isolated placement |
| Interior route | Safe movement and repairs | Cluttered paths blocking players |
| Fallback position | Secondary defense line | Unfinished sections during attacks |
| Coin reserve | Emergency repairs and upgrades | Empty wallet before nightfall |
Every effective security house answers three questions: how enemies enter, where your damage comes from, and where you retreat when a section fails. If your layout cannot answer all three, rebuild before the next wave.
Security House Builds Compared
Four proven build archetypes dominate security house design in Bunker vs Verity. Each fits a different team size and match stage.
Compact Solo Bunker
- Best for: Solo players, early survival
- Small central room, controlled entrance
- Short wall lines, cheap to repair
- Weakness: blocked firing angles are costly
Cooperative Crossfire Bunker
- Best for: Two or more players
- Two overlapping firing directions
- Shared approach-lane coverage
- Weakness: crowding reduces visibility
Long-Wave Reinforced Bunker
- Best for: Extended survival, late waves
- Primary line plus interior fallback route
- Reinforces repeated attack sections
- Weakness: expensive, slow to complete
Hidden-Defense Layout
- Best for: Protected turret positions
- Defenses behind strong structural cover
- Preserves clear openings toward lanes
- Weakness: over-cover creates blind spots
| Build | Build Cost | Survivability | Repair Ease | Best Wave Phase |
|---|---|---|---|---|
| Compact Solo | Low | ★★★ | ★★★★ | Early |
| Crossfire Co-op | Medium | ★★★★ | ★★★★ | Early–Mid |
| Reinforced Long-Wave | High | ★★★★★ | ★★★ | Mid–Late |
| Hidden-Defense | Medium | ★★★ | ★★ | Situational |
Do not expand into secondary rooms before your primary defense is functional. An unfinished large structure is more dangerous than a finished small one.
Turret Priorities for Your Security House
Turret value shifts as waves escalate. Early defenses need dependable coverage at reasonable cost, while late-game setups require specialized single-target damage, crowd control, and overlapping fields of fire.
| Role | Strengths | Best Use | Rating |
|---|---|---|---|
| Balanced Core Defense | Reliable damage, solid range, general value | Primary entrance position | S |
| Single-Target Damage | Eliminates durable threats quickly | Late waves, dangerous Verities | A |
| Crowd-Control Defense | Manages groups, buys repair time | Chokepoints, multi-threat waves | A |
| Fast-Attack Early Defense | Quick response, cheap initial coverage | Opening phase before income scales | B |
| Narrow-Specialty Defense | Effective only in exact placement | Secondary lanes, situational builds | C |
Prioritize overlapping coverage over quantity. A turret placed without a clear target lane contributes almost nothing, no matter its tier.
Step-by-Step Security House Setup
Follow this sequence to establish a defensible security house before nightfall. The order matters: structure first, coverage second, upgrades last.
Choose a defensible location
Pick a position with clear sightlines, room for movement and repairs, and space for later expansion. Avoid tight spots where walls or teammates block firing paths.
Build the core structure
Place main walls and the entrance first, then create a compact interior that can be reinforced without wasting early resources. Skip decorative construction.
Place first defenses
Position turrets where they cover the approach to the entrance and the most likely attack lane. Overlap coverage rather than isolating each placement.
Earn and preserve coins
Bank a reserve for repairs, extra walls, and emergency defenses. Never spend the full balance before nightfall.
Run a pre-night inspection
Check firing angles, clear movement paths, verify walls are complete, and confirm the team is inside the defensive zone before the wave begins.
The pre-wave inspection is where most losses are prevented. Blocked turrets, exposed entrances, and missing wall sections are all visible if you look.
Wave-by-Wave Defense Priorities
Wave pressure in Bunker vs Verity scales continuously, so resource timing decides runs. Spend before a crisis begins, not during it.
| Phase | Wall Priority | Turret Priority | Coin Rule |
|---|---|---|---|
| Early waves | Close exposed entrances first | One turret on the main approach | Keep a reserve after first builds |
| Middle waves | Upgrade repeatedly damaged sections | Add coverage only when lanes slip | Save for repair plus one upgrade |
| Late waves | Reinforce weakest structural points | Upgrade effective positions, overlap fire | Enter hard waves with a reserve |
| Between waves | Inspect damage, find next breach point | Check arcs and coverage gaps | Split between repairs and upgrades |
During late waves, protect the bunker core, repair immediately after damage spikes, and focus fire on the most dangerous target first. Chasing enemies away from the defense zone creates openings.
Security House Milestones:
- Close all exposed entrances before the first night
- Establish one overlapping turret position
- Maintain a coin reserve at all times
- Assign repair and combat roles in co-op
- Complete a pre-wave inspection every wave
FAQ
Q: Is a bigger security house always better in Bunker vs Verity?
No. Larger structures cost more and take longer to finish, leaving unfinished sections vulnerable during early attacks. A completed compact bunker with reliable entrance coverage often outperforms an unfinished large build.
Q: What is the best security house build for solo players?
The Compact Solo Bunker is the safest choice. Use a small central room with a controlled entrance, short wall lines, and defenses covering the primary approach, then expand only after income scales.
Q: How should co-op teams divide responsibilities?
Assign a builder for construction and repairs, a gunner for turret operation and sustained damage, and a scout to monitor exposed approaches. In larger teams, designate a resource coordinator to prevent duplicate purchases.
Q: When should I upgrade walls versus adding turrets?
Upgrade wall sections that are repeatedly damaged or under concentrated attack first. Add turret coverage only when a lane is consistently slipping through or existing firepower cannot clear waves efficiently.
This is an independent fan-made guide website and is not affiliated with Beyondd Games or Roblox.