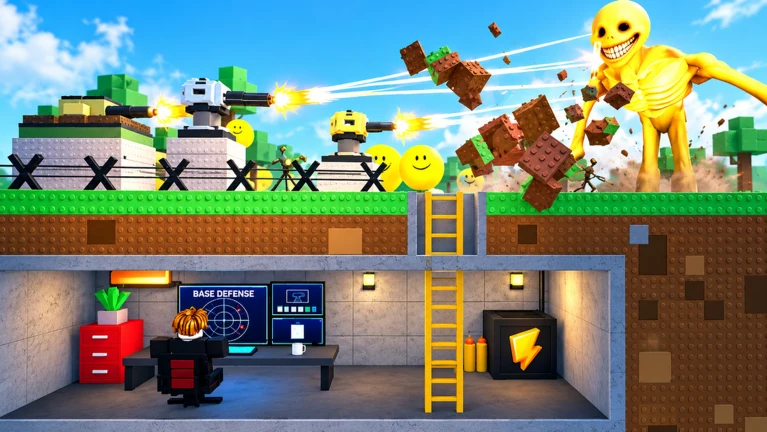
- Bunker vs Verity one chunk challenge restricts your entire base to a single small build zone
- Core rule: All walls, turrets, and upgrades must stay inside one chunk of terrain
- Hardest part: Covering every approach lane with heavily limited turret placement
- Key strategy: Repair reserves and overlapping fire beat raw structure count
- Best team setup: One builder, one gunner, shared coin pool, strict spending plan
What Is the One Chunk Challenge?
The Bunker vs Verity one chunk challenge is a community-style self-imposed run where your entire bunker, every turret, every wall segment, and every upgrade must fit inside one small chunk of the map. Instead of spreading defenses across multiple lanes, you commit to a single compact footprint and force the game's escalating Verity waves to come to you.
Bunker vs Verity is a defensive survival experience on Roblox built around constructing a bunker, placing turrets, earning coins from completed waves, and holding out against increasingly dangerous enemies. The one chunk format strips the game down to its most punishing fundamentals: space efficiency, repair timing, and coin discipline.
Before starting, agree on your chunk definition with teammates. Most players use a single terrain square or grid section visible on the build menu. Decide whether repairs count as "inside the chunk" and whether backup fallback positions are allowed. Mixed rules cause disputes mid-run.
Standard Challenge Rule Set
| Rule | Restriction | Why It Matters |
|---|---|---|
| Build zone | All structures inside one chunk | The core limitation of the run |
| Turrets | No turrets outside the chunk | Removes cross-map fire support |
| Fallback | No secondary bunker allowed | One breach can end the run |
| Repairs | Allowed only on chunk structures | Keeps upgrades contained |
| Coins | Shared pool, planned spending | Prevents duplicate purchases |
Choose a chunk with natural chokepoints on one or two sides. A chunk with three or four fully open approaches is dramatically harder because your limited turret count cannot form overlapping fire on every lane.
Chunk Selection and Layout
Not every chunk is equal. In a normal run you can compensate for bad terrain with numbers, but in the one chunk challenge your placement budget is fixed, so terrain quality decides most of your difficulty curve.
Chunk Quality Comparison
| Chunk Type | Approach Lanes | Difficulty | Best Defense Pattern |
|---|---|---|---|
| Corner chunk | 1-2 open sides | Easy | Concentrated entrance kill zone |
| Wall-adjacent chunk | 2 open sides | Medium | Crossfire with overlapping arcs |
| Open-field chunk | 3-4 open sides | Hard | Rotating repair priority |
| Elevated chunk | Depends on ramps | Variable | Range-extended turrets |
Compact Core Layout
- Single central room with one controlled entrance
- Short wall lines reduce repair cost
- All turrets share one firing lane
- Best for solo challenge runs
Crossfire Layout
- Two overlapping firing directions inside the chunk
- Teammates cover separate approach sides
- Works with 2-3 players sharing one chunk
- Requires clear interior movement path
Reinforced Shell Layout
- Double-layer walls on the most exposed side
- Interior fallback position for repairs
- Scales best into late waves
- Costs more coins to establish early
Inside a single chunk, walls and structures crowd together fast. Before each wave, walk your interior and confirm every turret still has an unobstructed firing arc. A blocked turret is the most common cause of one chunk run failures.
Step-by-Step Run Setup
Follow this sequence in your first few minutes. Order matters because early coins are limited and a wrong first purchase can leave your chunk exposed on the first night.
Scout and Claim Your Chunk
Survey the map before building. Identify how many approach lanes the chunk has and where enemies will naturally path. Claim it and communicate the boundary to teammates.
Close the Perimeter
Build the outer wall ring first, prioritizing the most exposed side. A fully enclosed chunk with one entrance is safer than a half-built structure with two turrets.
Place Your First Turret
Position one turret covering the entrance lane and the widest shared firing arc. In a one chunk run, every turret must pull double duty against multiple lanes.
Hold a Repair Reserve
Keep coins unspent after initial construction. Repairs during the first night are usually more valuable than an extra low-tier structure you cannot yet protect.
Upgrade Along the Breach Line
Between waves, reinforce whichever wall section took the most damage. Upgrade turrets only when coverage is already adequate across all lanes.
Structure survival comes first, then turret damage, then coverage expansion. Because you cannot build outward, your coins should flow toward durability and firepower rather than new positions.
Wave-by-Wave Survival Strategy
Enemy waves strengthen as the run progresses, and the one chunk challenge removes your room to retreat or expand. Your response has to shift by phase.
Phase Strategy Table
| Phase | Wall Priority | Turret Priority | Coin Discipline |
|---|---|---|---|
| Early waves | Close exposed entrances, no fancy upgrades | One turret on the main approach | Keep reserve after first builds |
| Middle waves | Upgrade repeatedly damaged sections | Add coverage only when a lane slips | Save for emergency repair plus one upgrade |
| Late waves | Reinforce the weakest side before each wave | Upgrade effective positions, maintain overlap | Enter hard waves with a full reserve |
| Between waves | Inspect for the next breach point | Check firing arcs and gaps | Split coins between repair and next upgrade |
Leaving your defenses to pursue a Verity is the fastest way to lose a one chunk run. Let turrets do the killing while you repair. If a section fails, collapse inward to the interior fallback position rather than abandoning the chunk.
Solo vs Co-op Difficulty
| Factor | Solo Run | Co-op Run (2-3 Players) |
|---|---|---|
| Repair coverage | Interrupts your shooting | Dedicated builder handles repairs |
| Coin income | Single stream | Shared pool, faster upgrades |
| Lane watching | One perspective only | Scout reports weak points early |
| Failure risk | Higher on multi-lane chunks | Lower with clear role division |
One Chunk Challenge Checklist
Run through this list before every wave launch. Each item addresses one of the recurring failure points in restricted-footprint runs.
Before Each Wave:
- All chunk walls intact or repaired to full
- Every turret has a clear firing arc
- Repair reserve held back, not fully spent
- Interior movement path unblocked
- Team roles confirmed: builder, gunner, coordinator
A common community benchmark for this format is surviving into the late-wave phase with a fully intact single-chunk shell. If your walls have never fully breached, your placement and repair rhythm are working, even if the run eventually ends.
FAQ
Q: What is the Bunker vs Verity one chunk challenge?
It is a self-imposed difficulty format where your entire bunker, all turrets, and every upgrade must stay inside one small chunk of terrain. You cannot expand outward or build fallback positions elsewhere on the map.
Q: Is the one chunk challenge an official game mode?
No. It is a player-created challenge format built on top of the standard wave survival gameplay. Bunker vs Verity does not enforce the restriction, so you and your team track the rules yourselves.
Q: What is the best chunk type for a first one chunk run?
A corner or wall-adjacent chunk with only one or two open approach lanes. Fewer lanes means your limited turret count can form overlapping fire, which is the single biggest advantage in a restricted run.
Q: Can I do the one chunk challenge solo?
Yes, but it is significantly harder. Solo runs force you to choose between repairing and shooting during a wave. If possible, run it with at least one partner so one player can maintain the structure while the other holds the firing position.