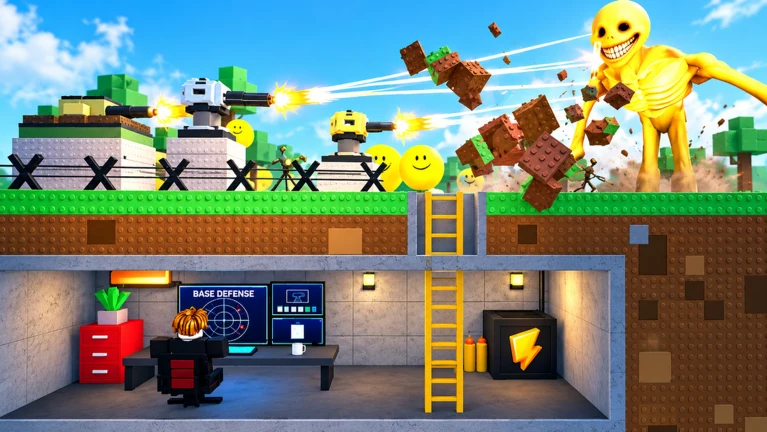
- Bunker vs Verity security bunker challenge: A defensive survival run built around protecting your bunker from escalating Verity waves
- Core loop: Build structure, place turrets, earn and preserve coins, survive each night assault
- Best strategy: Compact defensible layouts with overlapping turret coverage beat sprawling bases
- Critical tip: Always keep a coin reserve for emergency repairs between waves
- Co-op edge: Assign clear roles — builder, gunner, scout — to avoid duplicate spending and unattended breaches
What the Security Bunker Challenge Involves
The security bunker challenge is the heart of Bunker vs Verity, a Roblox defensive survival experience developed by Beyondd Games. Each match tasks you with constructing a bunker, arming it with defenses, and holding out against increasingly demanding waves of Verities. Servers hold up to six players, which makes coordination and layout planning decisive factors in how far a run goes.
Success is rarely about raw firepower alone. The challenge rewards players who control sightlines, manage an economy of coins, and reinforce weak points before pressure peaks rather than during a breach.
Treat every wave as a preparation test. The question is not "can I kill this wave" but "is my bunker ready for the next one."
Bunker Builds Ranked by Scenario
The strongest layout depends on team size, resources, and expected wave length. Compare the four proven approaches below before committing your coins.
| Build | Best For | Layout Priority | Main Weakness |
|---|---|---|---|
| Compact Solo Bunker | Solo / early survival | Small central room, controlled entrance, short wall lines | Blocked firing angles are costly |
| Cooperative Crossfire Bunker | 2+ players | Central area, two overlapping firing directions | Crowding reduces visibility |
| Long-Wave Reinforced Bunker | Extended runs | Primary line, protected interior route, fallback position | Expensive footprint, vulnerable while unfinished |
| Hidden-Defense Layout | Protected positions | Defenses behind strong structure with open firing arcs | Overusing cover creates blind spots |
Compact Solo Bunker
- Entrance coverage first
- Structural durability before secondary rooms
- Easy to repair mid-wave
Cooperative Crossfire Bunker
- Overlapping lanes
- Split repair and building duties
- Keep the main route accessible
Long-Wave Reinforced Bunker
- Fallback position
- Reserve funds for repeated repairs
- Reinforce most-exposed sections
Hidden-Defense Layout
- Protected turrets
- Clear openings toward the approach
- Avoid blocking firing arcs
Avoid building so tightly that walls, props, or teammates block your own turrets. Overlapping coverage beats stacking every defense in one spot.
Step-by-Step Challenge Walkthrough
Follow this sequence to establish a defensible position and hold it through the night.
| Phase | Action | Resource Rule |
|---|---|---|
| Opening | Choose a defensible location with clear sightlines | Do not spend the full starting budget |
| Construction | Build walls and a controlled entrance | Skip decorative builds early |
| Armament | Place defenses covering the main approach | Prioritize overlap over quantity |
| Economy | Earn coins, maintain a reserve | Reserve beats small early upgrades |
| Night prep | Final inspection of angles and paths | Repair before the wave, not during |
| Wave response | Repair and focus the weakest side | Never abandon the main defense |
Choose a Defensible Location
Pick a position with clear firing lanes and room for movement, repairs, and later expansion. Avoid terrain that funnels enemies behind your turrets.
Build the Core Structure
Place main walls and the entrance first, then create a compact interior you can reinforce without wasting early resources.
Place First Defenses
Position turrets where they cover the entrance and the most likely attack lane, with overlapping fields of fire rather than isolated placements.
Prepare for Nightfall
Check firing angles, clear movement paths, and get the team inside or near the defensive zone before the Verities arrive.
Hold and Repair
Watch the approach, repair damaged sections immediately, and shift attention to the weakest side instead of chasing enemies away from the bunker.
Between waves, inspect damaged sections, verify turret coverage, and assign responsibilities before the next assault begins.
Turret Roles and Wave Strategy
Turret value shifts with the threat pattern and stage of the run. Use roles rather than fixed rankings when planning your defense network.
| Role | Strengths | Best Use |
|---|---|---|
| Balanced Core Defense | Reliable damage, useful range | Primary entrance coverage, general-purpose |
| Single-Target Damage | High burst on durable threats | Later waves, priority Verity elimination |
| Crowd-Control Defense | Manages groups, buys repair time | Chokepoints, multi-threat waves |
| Fast-Attack Early Defense | Quick response, low cost | Opening phase coverage |
| Narrow-Specialty Defense | Situational effectiveness | Specific lane builds only |
Wave-phase priorities determine where your coins should go at any moment.
| Phase | Wall Priority | Turret Priority | Coin Preparation |
|---|---|---|---|
| Early waves | Close exposed entrances | One turret on the main approach | Keep a reserve after first builds |
| Middle waves | Upgrade frequently attacked sections | Add coverage only when lanes slip | Save for repairs plus one upgrade |
| Late waves | Reinforce weakest structure | Upgrade effective positions | Enter hard waves with a reserve |
| Between waves | Inspect for next breach point | Check angle and coverage gaps | Split coins between repair and upgrade |
The most common waste pattern: adding more turrets when existing ones are poorly placed, blocked, or covering nothing. Fix placement before buying quantity.
Security Bunker Challenge Checklist:
- Secure a compact, defensible footprint
- Establish overlapping turret coverage on the main lane
- Maintain a coin reserve for emergency repairs
- Complete a full inspection between every wave
- Assign and confirm team roles before nightfall
Co-op Roles for the Challenge
Coordinated teams outperform groups of solo builders. Divide responsibilities based on server size.
| Team Size | Recommended Roles | Coordination Tip |
|---|---|---|
| 2 players | Builder and Defender | Swap roles during prep windows |
| 3 players | Builder, Gunner, Scout | Scout calls threats early so builder reinforces |
| 4+ players | Dedicated defense team with resource coordinator | Use short, specific callouts: lane, repair, urgency |
| Any size | Wave Coordinator | Confirm repairs and staffing before each wave |
A useful callout names the affected lane, the required repair, and the urgency level — nothing more.
FAQ
Q: What is the Bunker vs Verity security bunker challenge?
It is the core defensive survival mode of Bunker vs Verity, a Roblox game by Beyondd Games. Players build a bunker, place turrets, manage coins, and defend against escalating Verity waves, with up to six players per server.
Q: Which bunker build is best for solo players?
The Compact Solo Bunker works best. Use a small central room with a controlled entrance, short wall lines, and defenses covering the primary approach, investing in entrance coverage and durability before secondary rooms.
Q: Should I spend all my coins before the first night?
No. Keep a reserve after your first construction purchases. A repair and reinforcement fund is usually more valuable than one additional early upgrade, especially once wave pressure increases.
Q: How do co-op teams avoid wasting resources?
Assign explicit roles — builder, gunner, scout, and a resource coordinator for larger teams — so members do not independently purchase the same defenses. Agree on a spending plan during preparation windows.