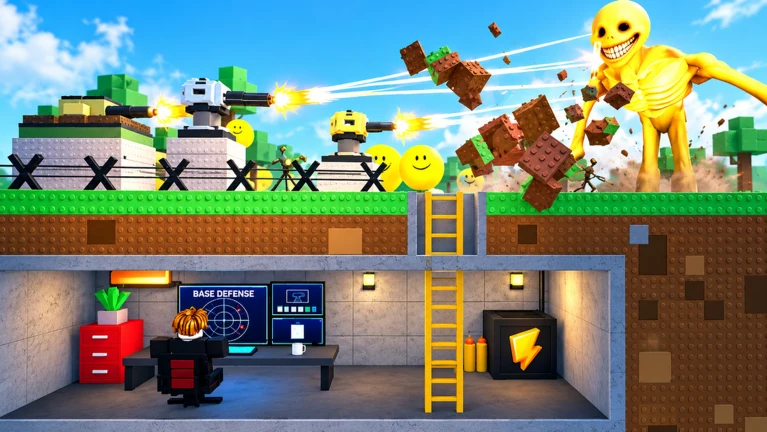
- Bunker vs Verity survive 99 days requires disciplined economy, layered walls, and repaired turrets every single wave.
- Core rule: never spend your full coin reserve — repairs win long runs, early upgrades do not.
- Best build: a reinforced primary defense line with a fallback position behind it.
- Team play: assign a builder, a gunner, and a resource coordinator to avoid duplicate spending.
- Late waves: enter every high-pressure wave with a banked reserve instead of relying on mid-wave income.
What Surviving 99 Days Demands
Reaching day 99 in Bunker vs Verity is a marathon, not a sprint. Enemy waves grow stronger as the match progresses, so a base that comfortably handles day 10 will collapse on day 40 if it was never designed to scale. Long-run survival depends on three pillars: a bunker layout with a fallback line, defenses that get upgraded instead of replaced, and coins that are treated as repair fuel rather than shopping money.
Short runs reward aggression. A 99-day run rewards patience — stabilize the base first, maintain damage output second, and only then expand into secondary coverage.
| Survival Pillar | Why It Matters | Failure Symptom |
|---|---|---|
| Layered walls | Buys time for repairs during breaches | One wall break ends the run |
| Overlapping turret fire | Clears grouped Verities efficiently | Enemies slip through single coverage lanes |
| Coin reserve | Funds emergency repairs and upgrades | Bankrupt by mid-wave on day 50+ |
| Defined team roles | Prevents duplicate purchases and unattended lanes | Two players rebuild the same wall |
Bunker Build for a 99-Day Run
The Long-Wave Reinforced Bunker is the layout most suited to extended survival. It uses a primary defense line, a protected interior route, and a secondary fallback position behind the first layer. When the outer line takes heavy damage, you retreat and fight from the second layer instead of losing the run to a single breach.
Primary Defense Line
- Covers the main approach lane
- Strongest walls and best turrets here
- Repaired between every wave
Interior Route
- Lets players move and repair safely
- Never blocks turret firing arcs
- Keeps the team inside the fight
Fallback Position
- Second layer behind the first
- Holds when the outer wall fails
- Buys time to rebuild the line
The larger footprint of a reinforced bunker costs more to build. Unfinished sections are vulnerable during early attacks — close the most exposed entrances before spending on anything optional.
Build Comparison for Extended Runs
| Build | Best For | Key Strength | Main Weakness |
|---|---|---|---|
| Long-Wave Reinforced | 99-day attempts | Fallback line absorbs breaches | Expensive, slow to complete |
| Cooperative Crossfire | 2+ player long runs | Two overlapping firing lanes | Crowding reduces visibility |
| Compact Solo | Early survival only | Cheap and fast to close | Poor scaling past mid waves |
Wave-by-Wave Resource Plan
Enemy waves become more difficult as the match progresses, so successful defense depends on spending resources before a crisis begins — not during one. Use this phase plan to decide when to upgrade walls, add turrets, and bank coins.
| Phase | Wall Priority | Turret Priority | Coin Rule |
|---|---|---|---|
| Early waves | Close exposed entrances, basic structure only | One turret on the main approach | Keep a reserve after first purchases |
| Middle waves | Upgrade sections enemies attack repeatedly | Add coverage only when a lane slips | Save for repairs plus one upgrade |
| Late waves | Reinforce the weakest sections first | Upgrade effective positions, keep overlap | Enter hard waves with a banked reserve |
| Between waves | Inspect damage, find next breach point | Check firing angles and gaps | Split coins between repairs and next upgrade |
Treat late-wave rewards as reinforcement funds, not expansion money. The most common way long runs die is a cosmetic or low-impact purchase made while the primary defense was still vulnerable.
Common Coin Wastes to Avoid
- Building multiple low-impact positions before confirming which lane actually needs protection
- Adding turrets when existing turrets are poorly placed or blocked
- Spending the entire balance before nightfall instead of holding a repair reserve
- Duplicate construction because teammates did not communicate purchases
Step-by-Step: The 99-Day Roadmap
Days 1–10: Establish the Core
Choose a defensible location with clear sightlines, close the entrances, and place your first turret covering the main approach. Build compact — expansion can wait.
Days 11–30: Reinforce and Bank
Upgrade the wall sections taking repeated hits. Keep overlapping turret coverage and hold a coin reserve large enough for one emergency repair plus one defensive upgrade.
Days 31–60: Build the Fallback Line
Construct the secondary position behind your primary line. Upgrade effective firing positions rather than placing turrets without a clear target lane.
Days 61–90: Sustain Under Pressure
Repair immediately after damage spikes, concentrate fire on the most dangerous Verities first, and delay every optional purchase while pressure rises.
Days 91–99: Protect the Core
Structural survival outweighs everything. Reinforce the weakest sections before each wave, staff the primary lanes, and commit the reserve only when the core is threatened.
In team runs, make the plan during the preparation window between waves — never while enemies are already attacking. Short, specific callouts (lane, repair needed, urgency) keep everyone aligned.
Run Preparation Checklist
Before Every High-Pressure Wave:
- Bunker fully repaired, no exposed sections
- Turret firing angles checked and unblocked
- Coin reserve covers one emergency repair
- Team roles confirmed: builder, gunner, coordinator
- Fallback position stocked and accessible
For three players, use Builder (structure and repairs), Gunner (turrets and sustained damage), and Scout (watch exposed approaches and report weak points early). For larger teams, designate one flexible player purely for emergency reinforcement.
FAQ
Q: Is surviving 99 days in Bunker vs Verity realistic for solo players?
It is significantly harder solo. The Compact Solo Bunker handles early waves well but scales poorly. A solo 99-day attempt demands near-perfect repair timing and a strict coin reserve, since there is no teammate to cover a lane while you rebuild.
Q: Should I add more turrets when waves get harder?
Only when a lane is consistently slipping through or existing firepower cannot clear a wave. Adding turrets when current ones are poorly placed or blocked wastes coins that should fund repairs and upgrades to proven positions.
Q: What is the most common reason long runs fail?
Spending the full coin balance before a difficult wave. Runs that enter high-pressure waves with a banked reserve can absorb damage spikes; runs that rely on mid-wave income usually cannot.
Q: How should a team divide responsibilities for a 99-day run?
Cover four functions: construction and repairs, turret operation, resource planning, and frontline response. Designate one resource coordinator to announce major purchases so teammates do not duplicate construction.