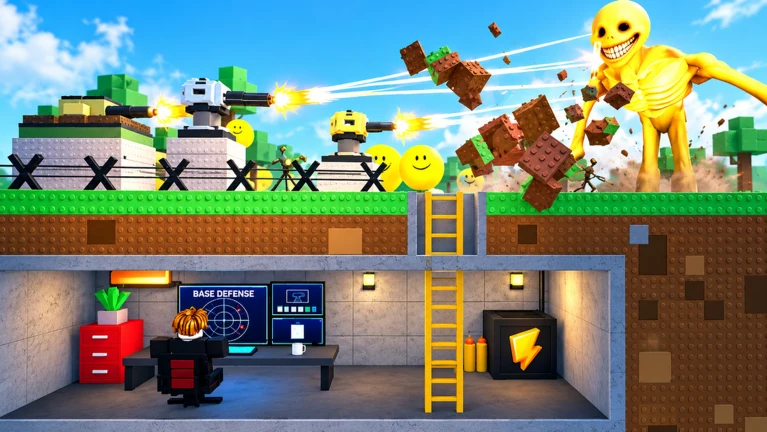
- Bunker vs Verity tsunami events push your defense to its limit with overwhelming pressure waves.
- Structural priority: Reinforce walls and close secondary entrances before the event begins.
- Coin reserve: Keep an emergency fund for mid-wave repairs instead of pre-spending everything.
- Team roles: Assign repair, turret operation, and scouting duties to avoid duplicate work.
- Fallback position: A secondary interior line keeps your run alive if the outer defense fails.
What the Tsunami Event Means for Your Bunker
The Bunker vs Verity tsunami is one of the most punishing pressure events you can face in a survival run. Instead of a steady trickle of Verities, the game floods your defense lane with concentrated waves that arrive faster than most unprepared teams can repair. Bunkers built for normal waves often collapse here because they depend on slow, reactive play rather than layered, pre-built defenses.
The core rule for surviving a tsunami-style event is simple: preparation beats reaction. Teams that finish their structural reinforcement, verify firing lanes, and hold a coin reserve before the event starts consistently outperform teams that try to build their way out of the crisis mid-wave.
Most tsunami deaths are not caused by insufficient firepower. They happen because players leave a secondary entrance unsealed or block their own turret firing arcs with rushed construction. Always do a final structural inspection before the pressure peaks.
Tsunami Defense Priorities by Phase
Each phase of the event demands a different spending and positioning focus. Use this table to decide where your coins and attention should go before the pressure arrives.
| Phase | Wall Priority | Turret Priority | Coin Rule | High-Pressure Action |
|---|---|---|---|---|
| Pre-event prep | Seal all entrances, repair weak sections | Verify coverage on the main approach | Hold a repair reserve | Final inspection of firing lanes |
| Early surge | Watch the most-exposed lane | Let turrets work, do not reposition | Spend only on critical gaps | Focus fire on the fastest threats |
| Peak pressure | Repair immediately after damage spikes | Maintain overlapping fields of fire | Reserve for emergency repair only | Protect the bunker core first |
| After the surge | Inspect and identify the next breach point | Check for blocked or wasted angles | Split coins between repair and upgrade | Reassign roles for the next wave |
Treat the coin reserve as a defensive tool, not leftover money. One full repair cycle during peak pressure is usually worth more than an extra turret purchased before the event.
Step-by-Step Tsunami Survival Setup
Choose a defensible footprint
Pick a location with clear sightlines toward the main approach, room for a fallback interior line, and enough space that teammates and walls do not block turret arcs.
Seal and reinforce
Close every entrance except the one you intend to monitor. Upgrade the wall sections that face the most likely attack lane before adding any secondary rooms.
Layer your defenses
Place the first turret to cover the primary approach, then add a second angle so two firing lanes overlap at the chokepoint. Overlap matters more than quantity.
Bank a repair reserve
Stop spending once your core defense is functional. Enter the tsunami with enough coins for at least one full wall repair and one emergency turret purchase.
Hold and repair
During the surge, keep one player on repairs, one on the strongest firing position, and everyone focused on the weakest bunker side rather than chasing enemies outside the defensive zone.
Fall back to your secondary interior position instead of abandoning the bunker. A single reinforced inner room with one clear firing lane can survive a surge that destroys the outer walls.
Best Bunker Layouts for Tsunami Pressure
Not every layout handles surge pressure equally. These builds match the tsunami event better than standard early-game designs.
Compact Kill-Funnel
- Small central room, single monitored entrance
- Two overlapping turret arcs at the choke
- Short wall lines = cheap, fast repairs
- Best for solo players
Crossfire Bunker
- Two firing directions on one central lane
- Teammates cover separate approach angles
- Shared repair duty on alternating sides
- Best for two to three players
Deep-Defense Layout
- Outer line plus interior fallback
- Second reinforced room behind the first layer
- Highest repair cost, highest survivability
- Best for long runs and late waves
| Layout | Survivability | Cost | Repair Difficulty | Team Size |
|---|---|---|---|---|
| Compact Kill-Funnel | ★★★☆☆ | Low | Easy | Solo |
| Crossfire Bunker | ★★★★☆ | Medium | Moderate | 2-3 players |
| Deep-Defense Layout | ★★★★★ | High | Demanding | 3-6 players |
Avoid over-protecting turrets behind heavy cover. Blocked firing arcs and blind spots reduce your effective range exactly when the surge needs maximum damage output.
Team Coordination and Goals
Coordination failures cause more tsunami wipes than weak defenses. Divide responsibilities clearly before the pressure starts.
| Team Size | Recommended Roles | Key Coordination Rule |
|---|---|---|
| 2 players | Builder + Defender | Communicate every purchase before spending |
| 3 players | Builder + Gunner + Scout | Scout calls breach points early |
| 4+ players | Dedicated repair, turret operators, flexible responder, resource coordinator | One player announces major purchases to prevent duplicates |
Tsunami Preparation Checklist:
- All entrances sealed except the monitored lane
- Turret firing arcs verified and unblocked
- Coin reserve held for one full repair cycle
- Fallback interior position marked
- Team roles assigned before the surge begins
Bunker vs Verity is a Roblox survival experience by Beyondd Games with six-player servers. Always check the official Roblox game page for current event details, since update notes may change wave behavior and defense stats.
FAQ
Q: What is the tsunami event in Bunker vs Verity?
The tsunami refers to a high-pressure enemy surge where Verities arrive in concentrated, fast-moving waves instead of a steady trickle. It tests your structural preparation, repair speed, and coin reserve more than raw firepower.
Q: Should I buy more turrets or save coins for the tsunami?
Save a repair reserve first. One full wall repair during peak pressure usually saves a run, while an extra poorly-placed turret adds little. Add turrets only after your reserve is secure and firing lanes overlap correctly.
Q: What is the best bunker layout against a tsunami?
A layout with a controlled entrance, overlapping turret arcs, and an interior fallback position handles surge pressure best. Solo players should use a compact kill-funnel; teams should build a crossfire or deep-defense layout.
Q: How do I recover if the outer defense breaks during the tsunami?
Fall back to your secondary interior line instead of abandoning the bunker. Concentrate all firepower on one clear lane, keep one player on repairs, and rebuild the outer wall only after the surge subsides.