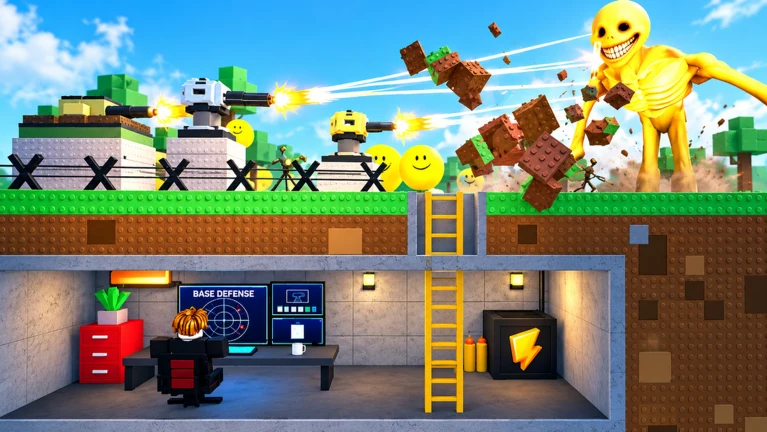
- Bunker vs Verity tips and tricks start with a compact, defensible bunker before the first night wave.
- Turret placement matters more than turret count — overlap firing lanes and protect approaches.
- Coin discipline wins runs: keep a repair reserve instead of spending your full balance.
- Wave phases demand different priorities in early, middle, and late stages.
- Co-op roles (builder, gunner, scout) prevent duplicate builds and uncovered breaches.
Core Bunker vs Verity Tips for Every Run
Bunker vs Verity tips and tricks all build on one principle: survive the night by making smart decisions before enemies arrive. Each run is won during preparation, not during the attack. Players who pick a defensible location, place defenses with overlapping coverage, and reserve coins for repairs consistently outlast those who spend everything early.
The four fundamentals below decide most outcomes. Master them before worrying about advanced builds.
Location First
- Clear sightlines from defenses to the entrance
- Room for repairs, movement, and expansion
- Avoid tight spaces that block firing paths
Entrance Control
- One monitored entrance beats multiple weak doors
- Concentrate turret coverage on the main approach
- Keep interior routes clear for repositioning
Resource Reserve
- Never spend the full coin balance before nightfall
- A repair fund is worth more than a small early upgrade
- Convert coins into survival power, not decoration
Threat Focus
- Eliminate enemies reaching the bunker first
- Do not chase enemies far from the defensive zone
- Concentrate fire on the most dangerous target
Do a final inspection before each night: check firing angles, clear movement paths, and look for blocked turrets or missing wall sections. A 30-second check often prevents a run-ending breach.
Bunker Builds: Which Layout Fits Your Team
The best bunker design depends on player count, resources, and expected wave length. Compare the four proven layouts and pick the one that matches your situation.
| Build | Best For | Layout Core | Priority | Main Weakness |
|---|---|---|---|---|
| Compact Solo Bunker | Solo / early survival | Small central room, controlled entrance | Entrance coverage and durability first | Blocked angles are very costly |
| Cooperative Crossfire | 2+ players | Central area, two overlapping firing lanes | Divide repair and build duties | Crowded interior limits movement |
| Long-Wave Reinforced | Extended waves | Primary line plus interior fallback route | Repair reserve, reinforce exposed sections | Large footprint, expensive, slow to finish |
| Hidden-Defense | Protected turrets | Defenses behind strong wall sections | Keep firing arcs open while adding cover | Over-cover creates blind spots |
Placement rules that apply to every build:
- Walls and entrance come before any secondary rooms
- Defenses must cover the approach lane, not sit in isolated corners
- A fallback position behind the first layer saves late-wave runs
- Expand only when the current line is fully functional
Do not build multiple low-impact positions before confirming which lane actually needs protection. Spread-out defenses are weaker than one reinforced chokepoint.
Turret Placement and Defense Priorities
Turret value shifts with the wave stage and threat pattern. A balanced core defense serves most of the run, while specialized options earn their cost in specific moments.
| Defense Role | Tier | Strengths | Best Use |
|---|---|---|---|
| Balanced Core Defense | S | Reliable damage, good range, strong value | Primary entrance position all run |
| Single-Target Damage | A | Kills durable threats fast | Later waves, one dangerous Verity |
| Crowd-Control | A | Manages groups, buys repair time | Waves hitting multiple lanes at once |
| Fast-Attack Early Defense | B | Cheap, quick response | Opening phase before income grows |
| Narrow-Specialty | C | Situational placement value | Secondary lanes, specific layouts |
Prioritize overlapping coverage over quantity. Adding more turrets when existing ones are blocked or poorly placed wastes coins without improving defense.
Wave-by-Wave Survival Strategy
Enemy waves grow harder as the match progresses, so resource timing decides who is still standing at the end. Follow this phase table to spend before a crisis instead of during one.
| Phase | Wall Priority | Turret Priority | Coin Rule |
|---|---|---|---|
| Early waves | Close exposed entrances before upgrades | One turret on the main approach | Keep a reserve after first builds |
| Middle waves | Upgrade frequently attacked sections | Add coverage only when a lane slips | Fund repair + one upgrade + one turret |
| Late waves | Reinforce weakest sections first | Upgrade effective positions, keep overlap | Enter hard waves with a full reserve |
| Between waves | Inspect damage, find next breach point | Check angles and coverage gaps | Split coins between repairs and next upgrade |
Establish the Core
Build the basic structure, close entrances, and place your first turret on the largest shared firing lane.
Reinforce Weak Lanes
During middle waves, upgrade the wall and turret that directly limit survival before expanding anywhere else.
Hold Under Pressure
In late waves, protect the bunker core, repair immediately after damage spikes, and focus fire on the most dangerous targets.
Reset Between Waves
Use the preparation window to assign roles, verify repairs, and confirm firing positions are staffed.
Coordinate so one player maintains the defense while another repairs or upgrades. Chasing enemies away from the defensive zone creates openings that cost runs.
Co-op Roles and Coin Management
Coordinated teams outperform groups of players building independently. Assign clear jobs, agree on a spending plan, and communicate before major purchases.
| Team Size | Recommended Roles | Key Responsibility |
|---|---|---|
| Two players | Builder + Defender | Builder handles walls and repairs; defender holds the strongest firing position |
| Three players | Builder, Gunner, Scout | Scout calls threats early so the builder reinforces the right section |
| Four or more | Dedicated Defense Team | One resource coordinator prevents duplicate purchases |
| Any size | Wave Coordinator | Confirms repairs, staffing, and coin reserve before each wave |
Economy rules that protect your run:
- Secure essential construction before any optional structure
- Improve the defense that is already proving useful
- Treat late-wave rewards as reinforcement funds, not spending money
- Use short callouts: affected lane, required repair, urgency level
Announce major purchases before making them. The most common team waste is two players buying the same defense type because nobody claimed responsibility for that lane.
Before Every Night Wave:
- All wall sections repaired or reinforced
- Turret firing angles clear and unblocked
- Coin reserve available for emergency repairs
- Each teammate has an assigned role
- Movement and fallback routes are passable
FAQ
Q: What is the most important Bunker vs Verity tip for beginners?
Build a compact, defensible bunker with one monitored entrance and keep a coin reserve for repairs. Beginners often lose runs by spending everything early or building too many weak positions instead of one reinforced chokepoint.
Q: Should I add more turrets when waves get harder?
Only if a lane is consistently slipping through. First check whether existing turrets are blocked or poorly placed. Upgrading effective, overlapping positions usually beats adding new coverage without a clear target lane.
Q: How should a team of three split responsibilities?
Use Builder, Gunner, and Scout roles. The builder maintains structure, the gunner controls turrets and sustained damage, and the scout monitors exposed approaches and reports weak points before they fail.
Q: How do I prepare for late waves?
Enter difficult waves with a full repair reserve rather than relying on income earned during the attack. Prioritize structural survival, keep overlapping turret coverage, and repair immediately after damage spikes.