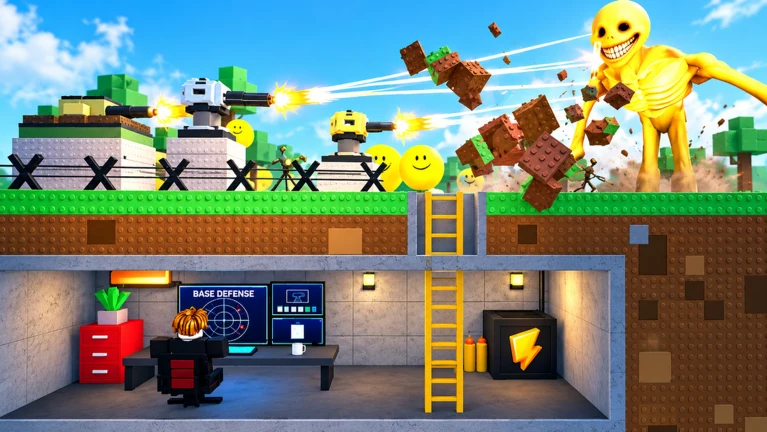
- Glass bunker refers to transparent-wall layouts that maximize sightlines for turrets in Bunker vs Verity.
- Best use case: builds centered on protected turret coverage and early threat detection.
- Main tradeoff: visibility is gained at the cost of structural durability versus reinforced walls.
- Key tip: keep a reinforced fallback layer behind any transparent section for late waves.
- Co-op fit: works well when at least one player handles constant repairs.
What Is a Glass Bunker in Bunker vs Verity?
A glass bunker is a base layout that uses transparent or low-durability wall sections to give turrets and players full visibility of approaching Verities. In Bunker vs Verity, defense quality depends heavily on firing angles and coverage of the primary approach lane, so a layout that removes blind spots can dramatically improve how quickly your defenses respond to each wave.
The design follows the same fundamentals as any strong bunker: protect the entrance, preserve clear firing lanes, keep a safe movement route for repairs, and include a fallback position. The glass approach simply prioritizes information and uninterrupted turret coverage over raw wall strength.
Transparent sections typically absorb less punishment than reinforced walls. Plan to upgrade or layer armor before high-pressure late waves, or the layout can fail during a concentrated breach attempt.
Glass Bunker vs Reinforced Bunker Comparison
Compare the two core build philosophies before committing your coins. Neither option is strictly better; the right choice depends on team size, wave length, and how much time your team can spend on repairs.
| Criteria | Glass Bunker | Reinforced Bunker |
|---|---|---|
| Sightlines | Excellent, full approach visibility | Limited, walls block firing arcs |
| Turret coverage | Overlapping lanes, fewer blind spots | Requires careful placement to avoid gaps |
| Wall durability | Lower, needs active repairs | High, absorbs repeated attacks |
| Coin efficiency | Cheap initial structure | Higher upfront cost |
| Repair demand | Constant during waves | Mostly between waves |
| Best phase | Early to mid waves | Mid to late waves |
| Team fit | Co-op with a dedicated builder | Solo or flexible teams |
The most reliable 2026 builds combine both: a transparent front layer for turret coverage with a reinforced interior fallback line. This gives you early-wave visibility and late-wave survivability in one structure.
Glass Bunker Build: Step-by-Step
Follow this sequence to construct a glass bunker that survives beyond the opening waves. The order matters: structure first, then defenses, then upgrades.
Pick a defensible location
Choose a spot with a clear main approach and room for a fallback line behind your transparent front. Avoid terrain that blocks turret firing arcs.
Lay the transparent front layer
Build the glass-facing walls along the primary approach so turrets inside can track Verities from the moment they spawn into view.
Place overlapping turrets
Position defenses so their fields of fire cross over the entrance and the most likely attack lane. Overlapping coverage beats isolated placement.
Add the reinforced fallback line
Build a second wall layer behind the glass section. This is where the defense stands when the front layer starts failing under pressure.
Reserve repair coins
Keep a coin reserve for emergency wall repairs and one replacement turret. Never spend your full balance before nightfall.
Reinforce between waves
Use the preparation window to upgrade damaged glass sections, fix blocked firing angles, and assign repair responsibilities.
If your turret can see and fire at enemies for the entire approach instead of only at the entrance, your glass layout is working correctly.
Turret Placement Inside a Glass Layout
Turret value depends on placement quality, and glass bunkers amplify both the strengths and weaknesses of each position. Review how each role performs inside a transparent structure.
| Turret Role | In a Glass Bunker | Placement Tip |
|---|---|---|
| Balanced core defense | Strong pick, benefits most from extended sightlines | Center it behind the glass front covering the main lane |
| Single-target damage | Excellent with long clear firing lanes | Focus on the approach Verities walk down |
| Crowd control | Good near the entrance chokepoint | Pair with the fallback line, not the glass wall |
| Fast-attack early defense | Useful for the first waves | Upgrade or replace before enemy durability rises |
| Narrow-specialty | Situational | Only use when its exact arc matches the lane |
Glass-Front Core
- Balanced turret behind transparent walls
- Full-lane coverage from spawn
- Best general-purpose setup
Chokepoint Control
- Crowd-control turret at the entrance
- Buys repair time under pressure
- Strong in multi-threat waves
Fallback Sniper
- Single-target turret on the rear line
- Covers breaches in the glass layer
- Scales well into late waves
Do not stack walls, objects, or teammates in front of turrets. A blocked firing arc wastes the entire advantage of a transparent layout.
Wave-by-Wave Defense Plan
Glass bunkers demand phased resource discipline. Match your spending to the pressure level of each wave stage.
| Wave Phase | Wall Priority | Turret Priority | Coin Rule |
|---|---|---|---|
| Early waves | Close exposed entrances with the glass front | One turret covering the shared lane | Keep a reserve after first builds |
| Middle waves | Repair frequently attacked sections first | Add coverage only when a lane slips | Save for repairs plus one upgrade |
| Late waves | Shift reliance to the reinforced fallback line | Upgrade proven firing positions | Enter hard waves with a reserve |
| Between waves | Inspect for the next likely breach | Check arcs and coverage gaps | Split coins between repairs and upgrades |
Glass Bunker Survival Checklist:
- Transparent front covers the full approach lane
- At least two turrets have overlapping fields of fire
- Reinforced fallback line built behind the glass layer
- Coin reserve kept for emergency repairs
- Repair responsibilities assigned before each wave
- Firing angles inspected between every wave
Assign one player to monitor the transparent front and call breaches early, while a second handles repairs and upgrades. Short, specific callouts naming the lane and urgency level work best.
Glass Bunker FAQ
Q: Is a glass bunker viable for solo players in Bunker vs Verity?
It is viable in early and mid waves, but solo players cannot repair and fight simultaneously. Build the reinforced fallback line earlier than a co-op team would, and keep a larger coin reserve for emergency wall repairs.
Q: What is the biggest weakness of a glass bunker?
Durability. Transparent sections absorb less punishment than reinforced walls, so concentrated late-wave attacks can break through quickly. Layering a reinforced second line behind the glass front is the standard solution.
Q: Which turrets work best in a glass bunker?
Balanced core defenses benefit most because extended sightlines let them fire for the entire enemy approach. Single-target damage turrets also perform well when placed along a long, clear lane toward the entrance.
Q: When should I stop investing in the glass layer?
Once enemy durability scales up in late waves, shift new spending to the reinforced fallback line and turret upgrades instead of replacing transparent sections repeatedly.