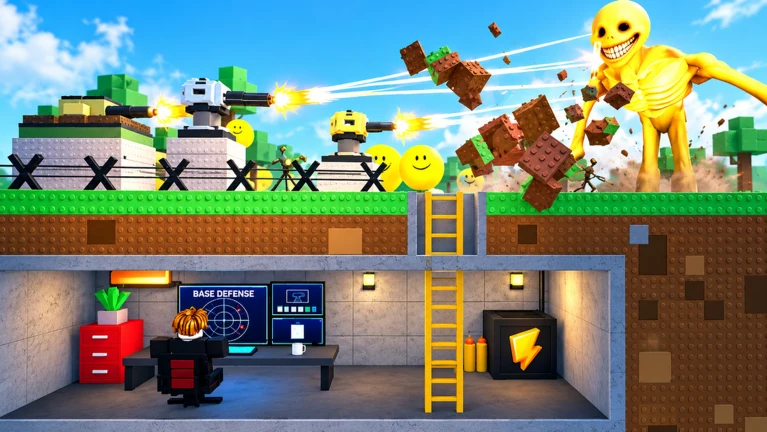
- Safest base designs prioritize entrance control, clear firing lanes, and a repair reserve
- Compact Solo Bunker is the most reliable layout for new and solo players
- Crossfire layouts let co-op teams cover multiple approach lanes without gaps
- Long-wave builds add a fallback position behind the first defensive layer
- Never spend every coin before nightfall — repairs decide most failed runs
What Makes a Base Safe in Bunker vs Verity
In Bunker vs Verity, the safest base is not the largest one — it is the one that survives repeated Verity waves while staying cheap to repair. Safety comes from four principles: a controlled entrance, overlapping turret coverage, an interior movement route for repairs, and a fallback position if the first line fails.
| Safety Factor | Why It Matters | Common Mistake |
|---|---|---|
| Entrance control | One monitored entry point concentrates all threats | Multiple unwatched entrances |
| Firing lanes | Turrets and players need clear sightlines | Walls blocking turret arcs |
| Repair access | You must reach damaged sections during a wave | No interior route past defenses |
| Coin reserve | Emergency repairs save runs | Spending everything before nightfall |
| Fallback position | A second line prevents instant collapse | No backup behind the first wall |
Building a large base early looks safe but usually is not. Unfinished sections become free entry points for Verities, and a bigger footprint costs far more to reinforce when waves get stronger.
Safest Base Layout Comparison
The right layout depends on team size and how long you expect the run to last. These four designs cover the most common situations.
Compact Solo Bunker
- Best for: Solo players and early survival
- Small central room with one controlled entrance
- Short wall lines are cheap to repair
- Highest safety-per-coin for new players
Co-op Crossfire Bunker
- Best for: Two or more players
- Two overlapping firing directions cover separate lanes
- Split repair and building responsibilities
- Weak if the interior becomes crowded
Long-Wave Reinforced Bunker
- Best for: Extended survival runs
- Primary line plus protected interior route
- Secondary fallback behind the first layer
- Expensive — unfinished sections are vulnerable early
Hidden-Defense Layout
- Best for: Protecting valuable turrets
- Defenses placed behind strong structural sections
- Keeps firing arcs open toward the approach
- Overusing cover creates blind spots
| Layout | Safety Rating | Cost | Team Size | Main Weakness |
|---|---|---|---|---|
| Compact Solo Bunker | ★★★★☆ | Low | 1 | Limited space, blocked angles are costly |
| Co-op Crossfire Bunker | ★★★★★ | Medium | 2-6 | Visibility drops if over-expanded |
| Long-Wave Reinforced | ★★★★★ | High | 2-6 | Vulnerable while under construction |
| Hidden-Defense Layout | ★★★☆☆ | Medium | 1-6 | Blind spots reduce effective range |
If you are unsure how long the run will last, start with the Compact Solo structure and expand into the Long-Wave design only after the first few waves confirm your income. Expanding too early wastes coins on walls you may never need to reinforce.
Safest Base Setup: Step by Step
Follow this build order to reach a defensible position before the first night without draining your coins.
Choose a defensible location
Pick a spot with clear sightlines toward the main approach, room for movement and repairs, and space for later expansion. Avoid cramped terrain that blocks firing paths.
Build walls and a single entrance
Place the main walls and one monitored entrance first. Keep the interior compact so it can be reinforced without wasting early resources on decoration.
Place overlapping defenses
Position your first turret so it covers the approach to the entrance and the most likely attack lane. Overlapping coverage beats isolated placements.
Keep a coin reserve
Earn coins during safe windows, but do not spend the full balance before nightfall. A reserve for repairs is usually worth more than a small early upgrade.
Run a final night inspection
Check firing angles, clear movement paths, and confirm every wall section is closed before the Verities arrive. Most early failures come from a blocked turret or a missing wall piece.
Defend and repair, do not chase
During the wave, watch the approach, repair damaged sections, and focus on the weakest side of the bunker. Chasing enemies away from the defense zone creates openings.
A base that is fully closed and modestly defended survives far more often than a half-finished large base with extra turrets. Finish the structure before adding firepower.
Defense Upgrades by Game Phase
Where you spend coins changes as waves grow stronger. Use this table to time your upgrades instead of reacting after a breach.
| Phase | Wall Priority | Turret Priority | Coin Rule |
|---|---|---|---|
| Early waves | Close exposed entrances before upgrades | One turret on the main approach | Keep a reserve after first purchases |
| Middle waves | Upgrade frequently attacked sections first | Add coverage only when a lane slips | Save for one repair plus one upgrade |
| Late waves | Reinforce the weakest sections | Upgrade effective positions, keep overlap | Enter hard waves with a full reserve |
| Between waves | Inspect damage, find the next breach point | Check angles and coverage gaps | Split coins between repairs and next upgrade |
Adding more turrets when existing turrets are poorly placed or blocked does not improve safety. Fix placement and firing arcs before buying anything new.
Co-op Role Assignment
In team runs, safety depends on divided responsibilities rather than shared improvisation.
| Team Size | Recommended Roles | Key Coordination |
|---|---|---|
| 2 players | Builder + Defender | Communicate before any purchase |
| 3 players | Builder, Gunner, Scout | Scout calls threats early so the builder reinforces in time |
| 4+ players | Dedicated defense team with a resource coordinator | Short callouts: lane, repair needed, urgency |
Safe Base Milestones:
- Secure one controlled entrance with clear sightlines
- Establish overlapping turret coverage on the main lane
- Keep an emergency repair reserve at all times
- Build a fallback position before late waves
- Complete a full structure inspection before each night
FAQ
Q: What is the safest base layout in Bunker vs Verity for solo players?
The Compact Solo Bunker is the safest option for solo play. Use a small central room with one controlled entrance, short wall lines, and defenses covering the primary approach. Its low cost means you can always afford repairs, which decides most solo runs.
Q: Should I build a large base early for extra safety?
No. A large unfinished base is usually less safe than a compact completed one. Unfinished sections become entry points for Verities, and the larger footprint costs more to reinforce. Start compact and expand only after your income is stable.
Q: How many coins should I keep in reserve?
Keep enough for at least one emergency repair plus one defensive upgrade or replacement turret. Avoid committing your full reserve before a difficult wave — income earned during an attack is not guaranteed.
Q: How do co-op teams keep a base safe?
Divide roles instead of building the same defenses independently. Assign a builder for walls and repairs, gunners for turret lanes, and a flexible player for emergency response. Confirm the plan during the preparation window, not mid-wave.