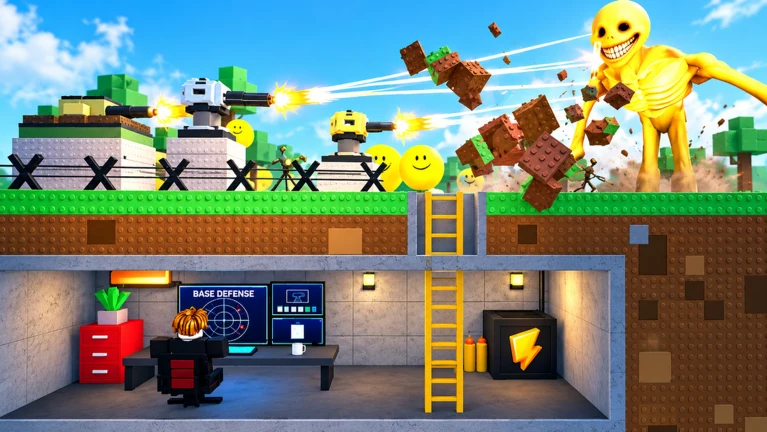
- Bunker vs Verity security house design decides whether you survive the night or lose your base.
- Entrance control matters more than base size: cover the main approach first.
- Turret placement should create overlapping fields of fire, not isolated damage.
- Coin reserves for repairs beat optional early upgrades almost every time.
- Team roles (builder, gunner, scout) prevent duplicate spending and open lanes.
Why Your Security House Layout Matters
In Bunker vs Verity, your security house is the difference between a controlled defense and a panicked scramble. A strong layout gives your defenses clear sightlines, keeps a safe movement route for repairs, and preserves a fallback position when Verities break through. A weak layout does the opposite: blocked firing angles, exposed entrances, and wasted coins on structures that never contribute.
The three elements every security house must balance are structure, coverage, and mobility. Walls control where enemies can attack. Turrets control how much damage you output while you repair or reposition. Interior routes keep you alive long enough to use both.
Build the minimum structure needed to control the battlefield, then reinforce what is already working. Expanding before your first defense line is functional is the most common way new players lose early waves.
| Element | Role | Failure Mode |
|---|---|---|
| Walls | Direct enemy approach into covered lanes | Gaps let Verities attack from multiple angles |
| Entrance | Single monitored chokepoint | Unwatched entrances collapse defenses quickly |
| Turrets | Sustained damage while you repair | Blocked arcs waste coins entirely |
| Interior route | Safe movement for repairs | Dead ends trap you during breaches |
| Fallback position | Second line behind the first | No fallback means one breach ends the run |
Best Security House Builds Compared
The strongest design depends on player count, resources, and expected wave length. Compare these four proven layouts before committing your coins.
Compact Solo Security House
- Best for: solo players and early survival
- Small central room with one controlled entrance
- Short wall lines reduce repair costs
- Weakness: blocked firing angles are very costly
Cooperative Crossfire House
- Best for: two or more players
- Two overlapping firing directions on shared lanes
- Split repair and building responsibilities
- Weakness: crowded interiors reduce visibility
Long-Wave Reinforced House
- Best for: extended survival runs
- Primary line, protected route, and secondary fallback
- Reserve resources for repeated reinforcement
- Weakness: large footprint is expensive and slow to finish
Hidden-Defense Layout
- Best for: protecting valuable turrets
- Defenses placed behind strong structural sections
- Openings preserved toward the approach
- Weakness: over-cover creates blind spots and lost range
| Build | Players | Build Cost | Repair Difficulty | Late-Wave Rating |
|---|---|---|---|---|
| Compact Solo | 1 | Low | Easy | ★★★ |
| Crossfire Co-op | 2-3 | Medium | Medium | ★★★★ |
| Reinforced Long-Wave | 3+ | High | Hard | ★★★★★ |
| Hidden-Defense | Any | Medium | Medium | ★★★★ |
Do not overuse cover in the Hidden-Defense layout. Protecting turrets behind walls can block their firing arcs and shrink effective range, turning your best defense into dead weight.
Step-by-Step: Building a Security House That Holds
Follow this sequence to establish a security house that survives the first nights and scales into later waves.
Choose a defensible location
Pick a position with clear sightlines, room for movement and repairs, and space for later expansion. Avoid spots where walls, objects, or teammates block your firing path.
Build the core structure
Place main walls and the entrance first, creating a compact interior you can reinforce without wasting early resources. Skip decorative construction during the opening phase.
Place your first defenses
Position defensive equipment so it covers the approach to the entrance and the most likely attack lane. Prioritize overlapping coverage over spreading defenses thin.
Earn and preserve coins
Use safe windows to earn coins while keeping a reserve for repairs, extra walls, and emergency defenses. Do not spend your full balance before nightfall.
Run a pre-night inspection
Check firing angles, clear movement paths, and confirm the team is inside or near the defensive area before the wave begins. This reveals blocked turrets and missing wall sections.
Respond without abandoning the base
Watch the approach, repair damaged sections, and shift attention to the weakest side of the house. Chasing Verities away from the defensive zone creates openings.
A 30-second final check before each wave consistently exposes blocked turrets, exposed entrances, and unfinished wall sections — the three most common causes of sudden base loss.
Wave-by-Wave Defense Priorities
Enemy waves grow stronger as the match progresses, so resource timing matters as much as layout. Spend before a crisis begins, not during it.
| Phase | Wall Priority | Turret Priority | Coin Rule |
|---|---|---|---|
| Early waves | Close exposed entrances before upgrades | One turret on the main approach | Keep a reserve after first purchases |
| Middle waves | Upgrade frequently attacked sections | Add coverage only when a lane slips | Save for repair plus one upgrade |
| Late waves | Reinforce weakest sections first | Upgrade effective positions, keep overlap | Enter hard waves with a reserve |
| Between waves | Inspect damage, find next breach point | Check arcs and coverage gaps | Split coins between repairs and next upgrade |
Treat late-wave rewards as reinforcement funds, not guaranteed expansion money. Committing your full reserve before a difficult wave leaves you unable to repair when damage spikes hit.
Coin Spending and Team Coordination
Coins are most valuable when converted into reliable survival power. Avoid the classic waste patterns that sink otherwise solid security houses.
| Stage | Smart Spending | Common Waste |
|---|---|---|
| Opening | Essential construction, then best defensive position | Multiple low-impact positions before knowing the active lane |
| Development | Fix the limiting wall or turret, then expand | Adding turrets when existing ones are blocked |
| Late phase | Sustained damage and structural durability | Cosmetic upgrades while the base is vulnerable |
| Team play | Shared spending plan, assigned lanes | Duplicate construction from poor communication |
Security House Milestones:
- Establish a controlled entrance before the first night
- Achieve overlapping turret coverage on the main lane
- Maintain a coin reserve equal to one major repair
- Build a fallback position behind the primary line
- Assign repair and gunner roles before late waves
Use short, specific callouts — affected lane, required repair, urgency level. The scout should report threats early so the builder reinforces the correct section before it fails.
FAQ
Q: What is the best security house layout for solo players in Bunker vs Verity?
The Compact Solo Bunker works best: a small central room with one controlled entrance, short wall lines, and defenses covering the primary approach. Focus on entrance coverage and structural durability before adding secondary rooms.
Q: Should I upgrade walls or add more turrets first?
Upgrade whatever is directly limiting survival. If a specific wall section is repeatedly attacked, reinforce it first. Only add turrets when a lane is consistently slipping through or existing firepower cannot clear waves efficiently.
Q: How many coins should I keep in reserve?
Keep enough for at least one emergency repair plus one defensive upgrade. Entering a difficult wave with an empty wallet is one of the most common reasons security houses fall during late-game pressure.
Q: How do co-op teams avoid wasting resources?
Assign clear roles — builder, gunner, scout, and a resource coordinator for larger teams — and communicate major purchases before spending. Duplicate construction from uncoordinated spending is the biggest co-op economy drain.